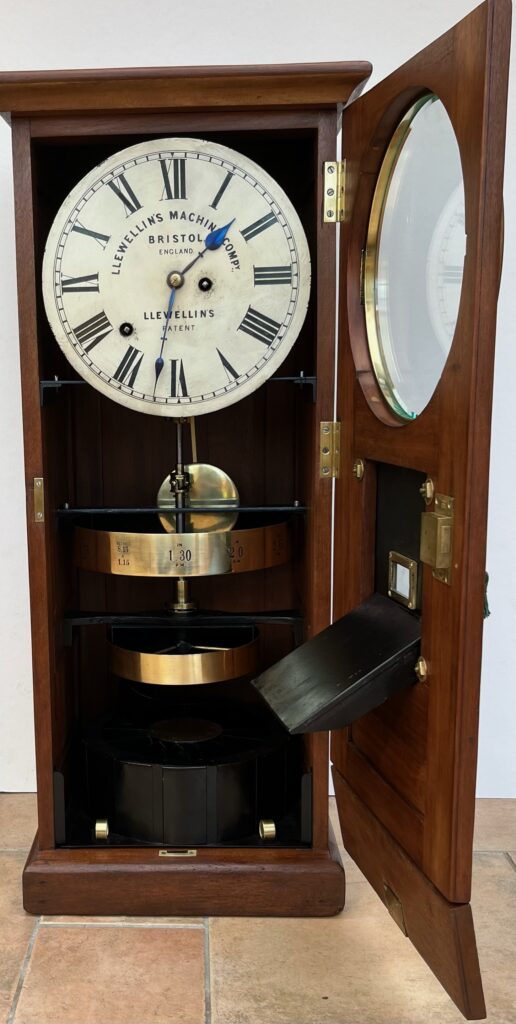
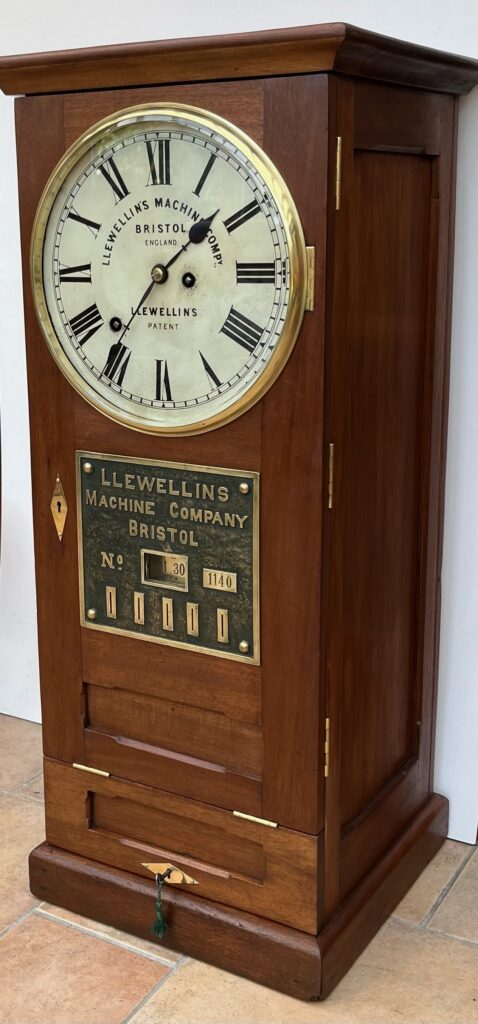
Having only ever seen photographs of two of these very rare and early time check machines before, finding this one was akin the finding the holy grail. It certainly deserved a lot of time and effort to restore it to its former glory.
The woodwork was in a bad state, the glass dial window was cracked, steelwork rusted, the lock was missing on the bottom flap, and the main door was locked with no key.
The first task was to get the door open without causing any damage to the woodwork.
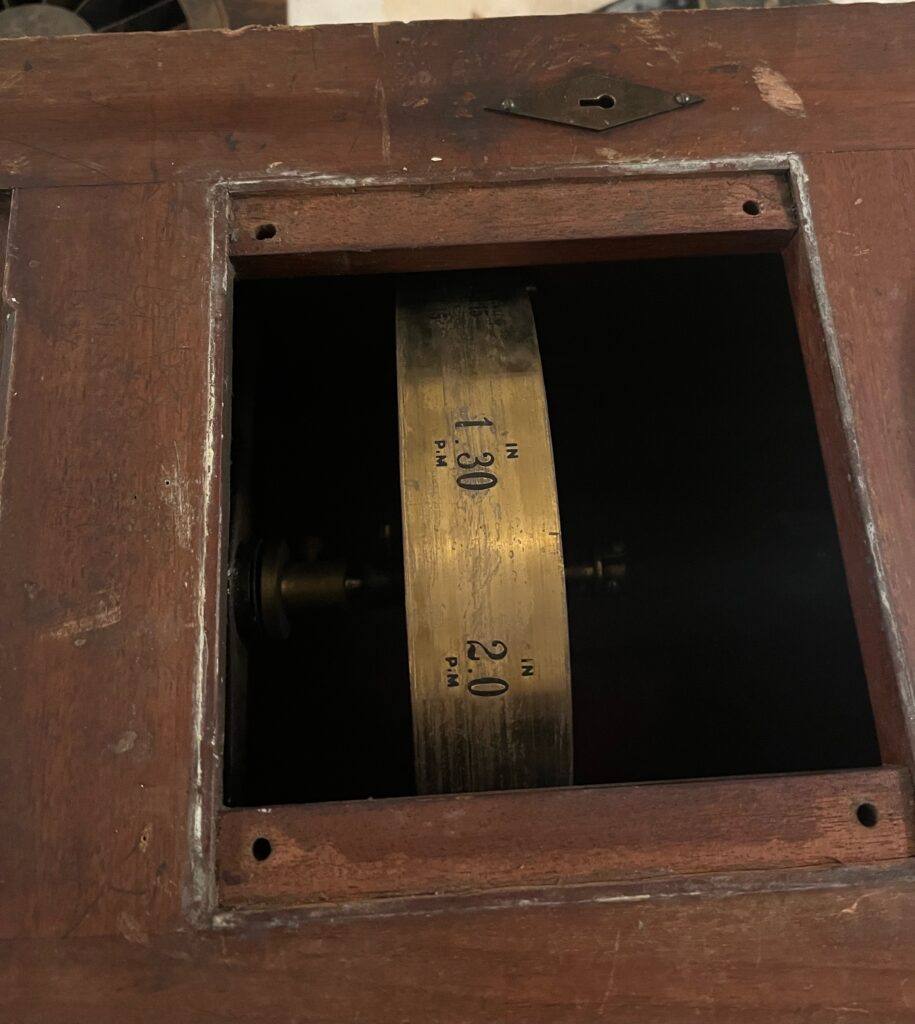
Not without some colourful language I was just able to stretch my arm through the open bottom flap and undo the bolts that secured the large brass check insertion plate. I could then loosen off and drop the time marked brass drum so that I could access and unscrew the lock from the inside.
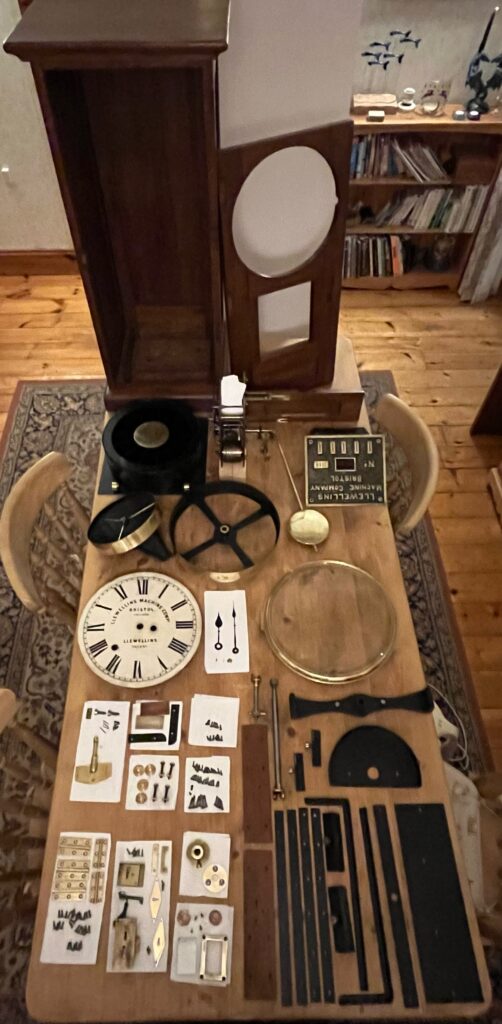
Having taken the door off and removed all the internal parts, the wooden cabinet was found to be in a very sorry state. It was all scraped, sanded and waxed, both externally and internally.
It was then a case of going through all the individual items; fine sanding and polishing brass parts, removing rust from steel parts and sanding and re-painting everything finished in black. All under the watchful eye of the quality control manager of course…
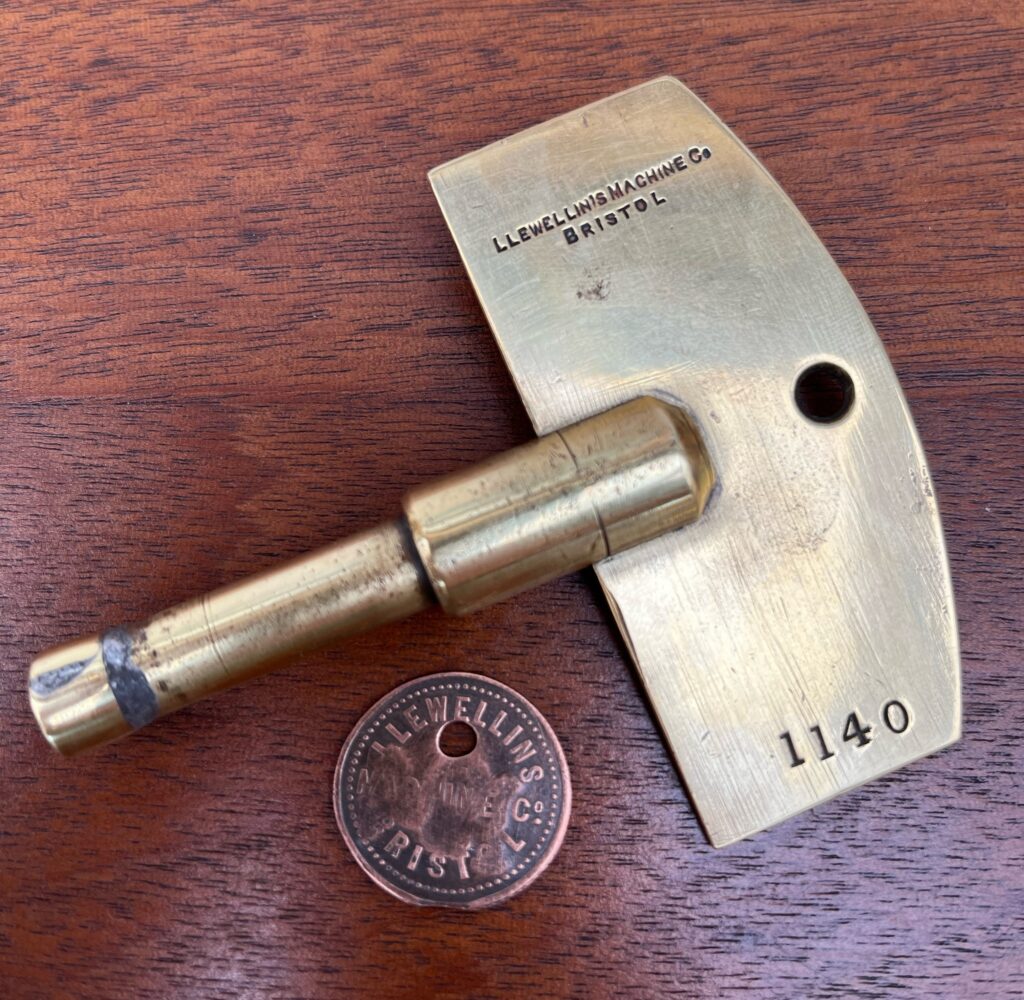
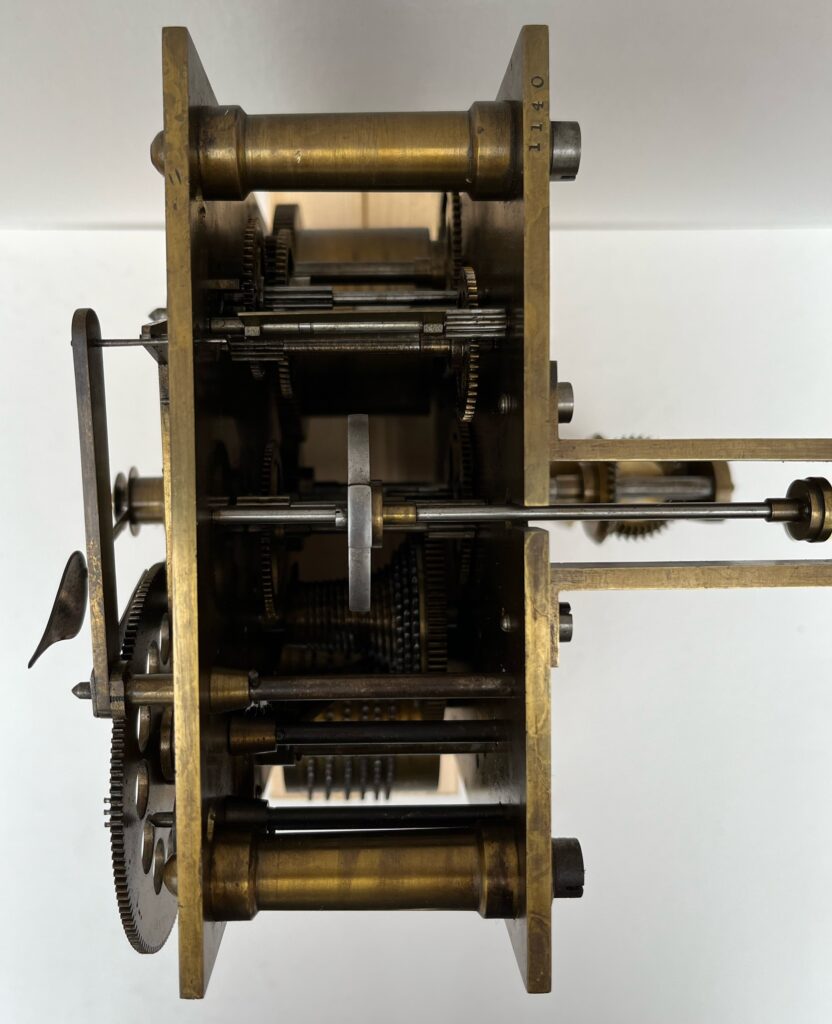
Amazingly I found the original winding key at the bottom of the cabinet. It is stamped with the machine’s serial number 1140, which appears on the front brass plate and on the clock movement chassis.
And thanks again Des for the original Llewellin time check!
There wasn’t a pendulum, so with the help of the photographs that I’d been sent of similar machines I was able to make one that would as far as possible replicate an original.
This involved using new square brass rod with a brass plated bob that I had spare, and making a suspension spring with near enough the same dimensions. The brass rod was tapped so that an adjustment nut could be used to accurately set the timing. Many frustrating experimental hours spent on this to get it working continually and correctly with the movement!
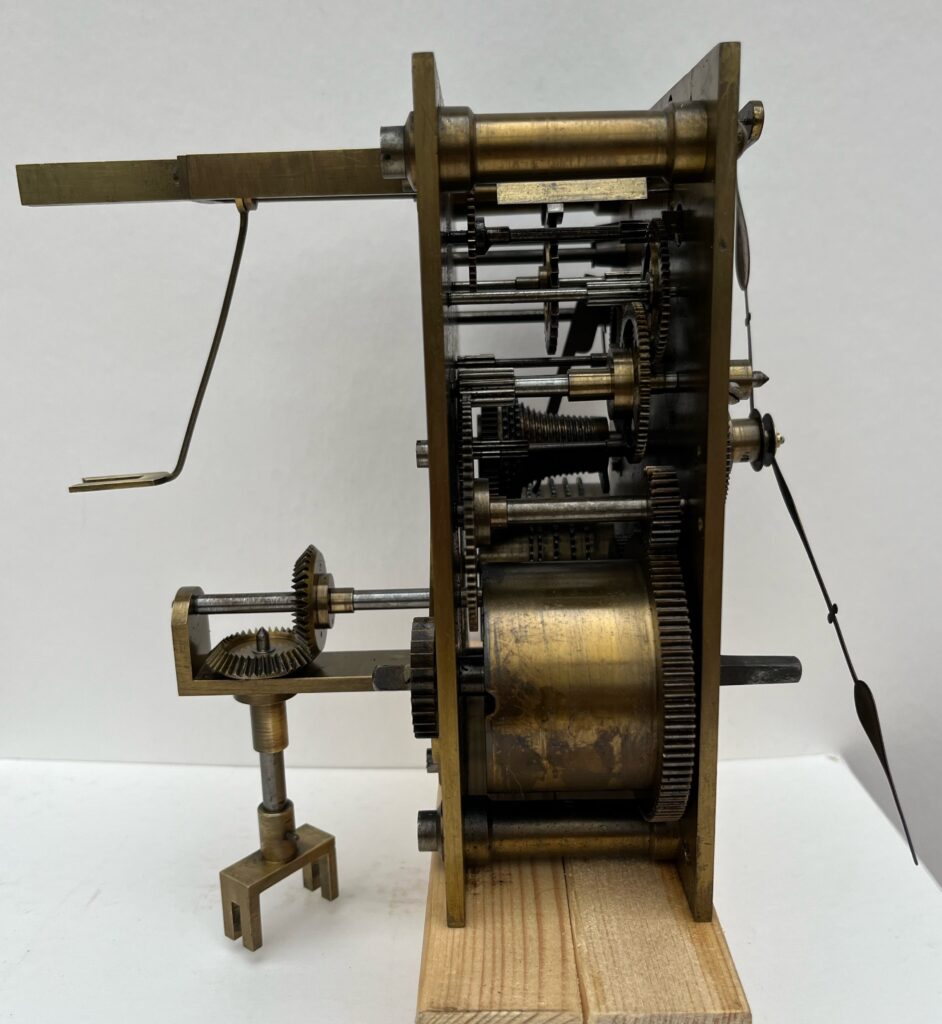
The clock employs a very accurate fusee movement which was in good condition and required little work, just cleaning and oiling.
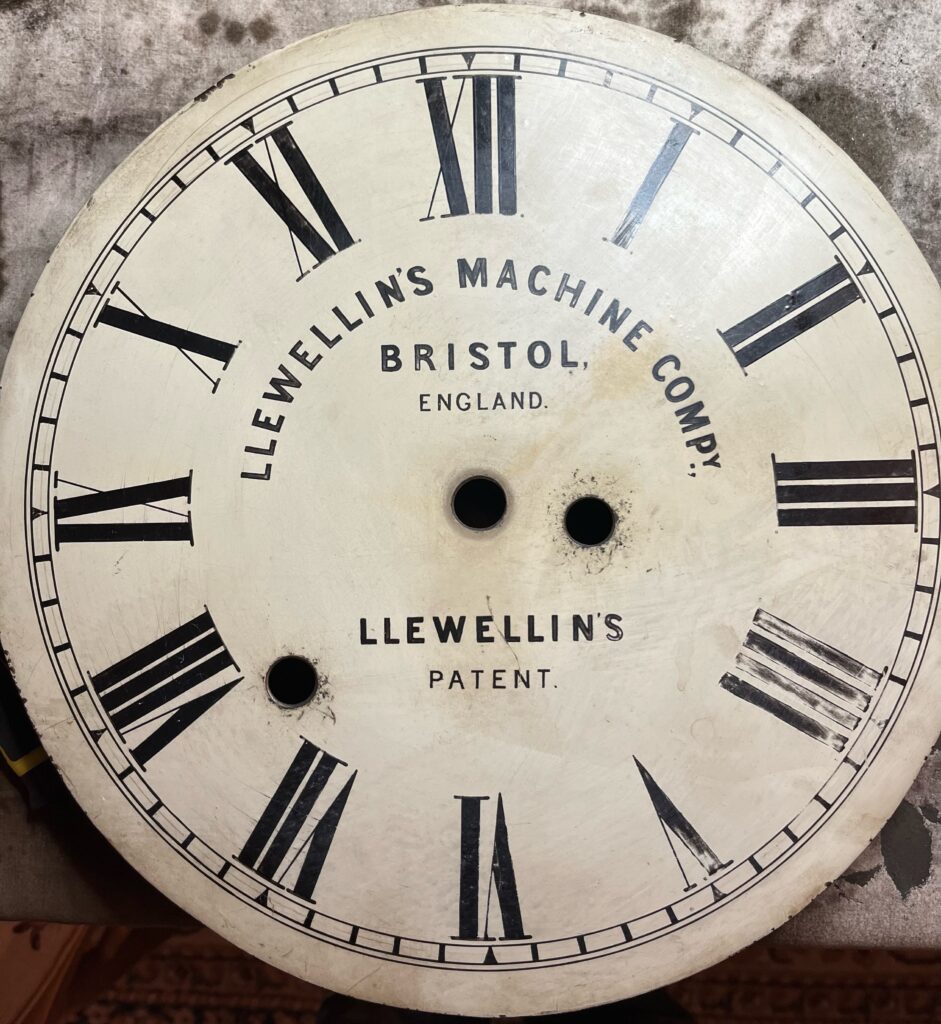
The clock dial wasn’t in too bad a condition – just some areas where the black paint had worn off. I was able to go over it with a fine paintbrush to fill in the worst areas.
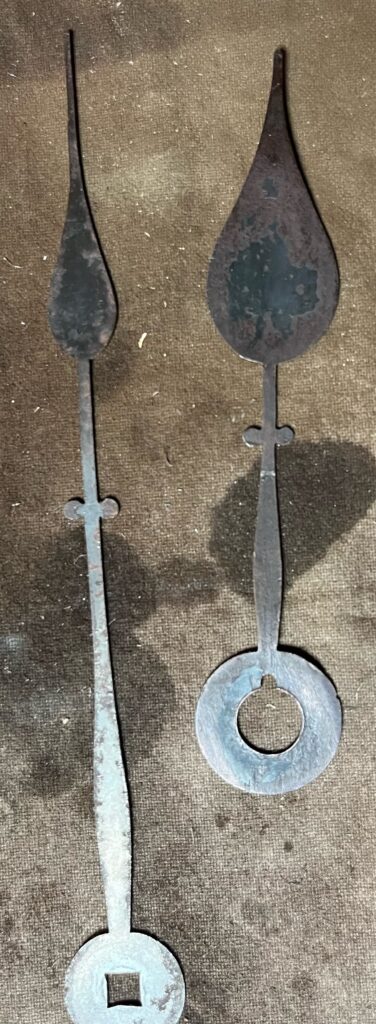
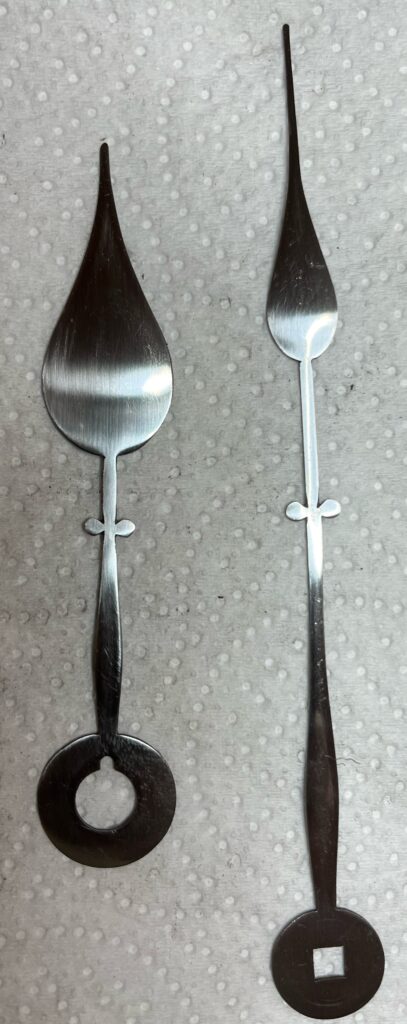
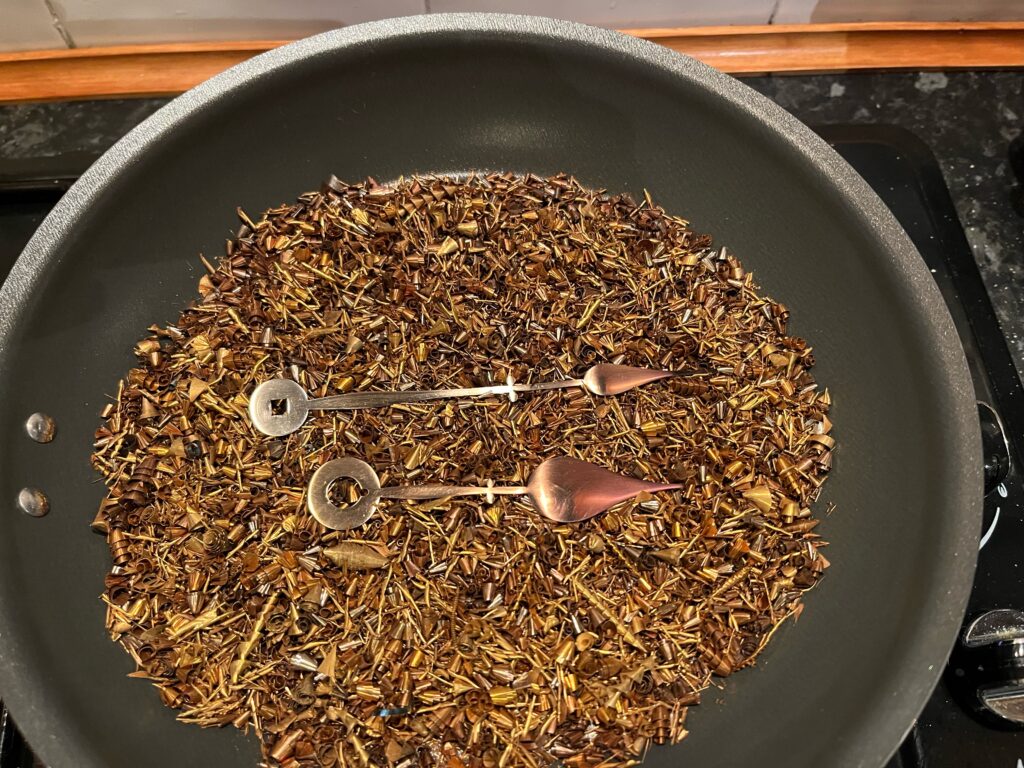
The clocks hands looked a mess – badly corroded. I decided to try to restore them to their original look, i.e. with ‘bluing’ such that they appear black but with an iridescent blue when looked at with the light at certain angles.
This isn’t something I’ve done before, but with the help of YouTube tutorials (and much to my surprise) I managed to achieve a good result. The steel hands were fine sanded and polished, then ‘fried’ in a pan of brass finings.
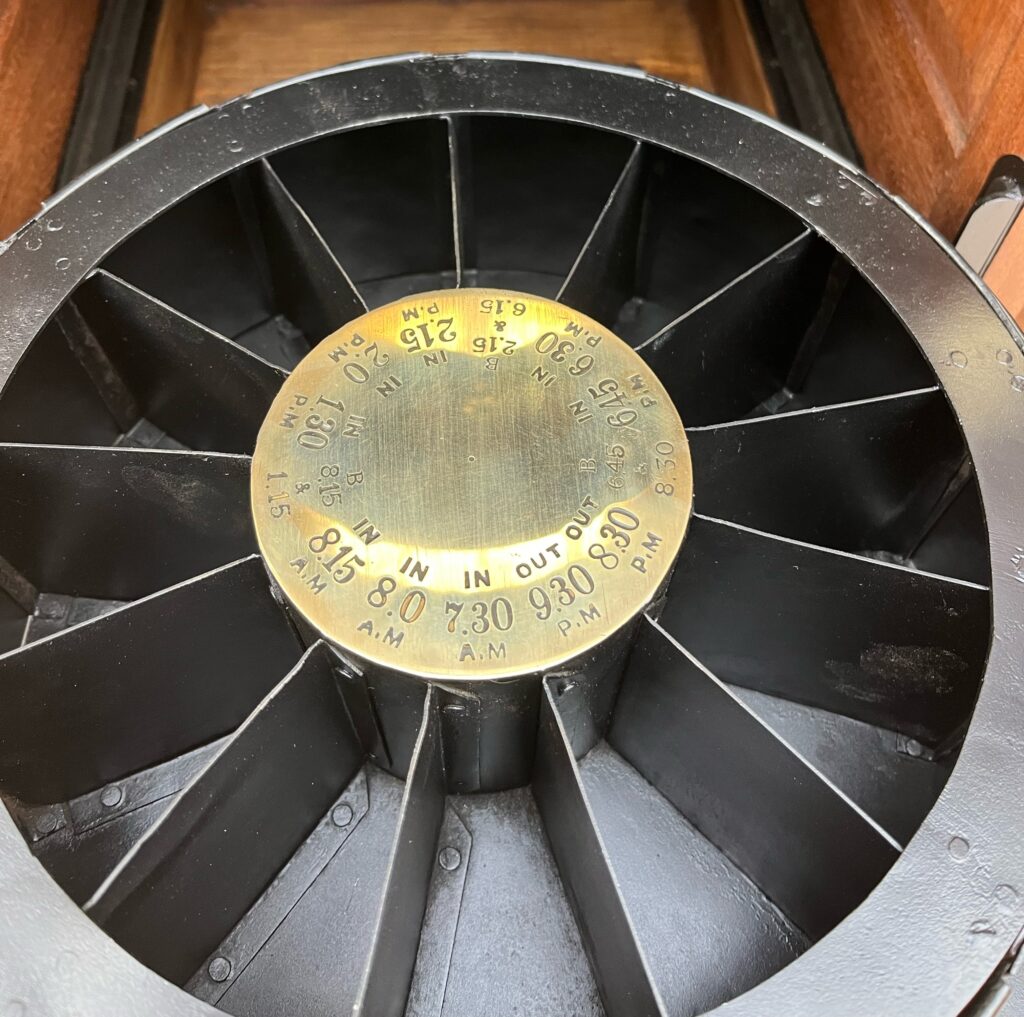
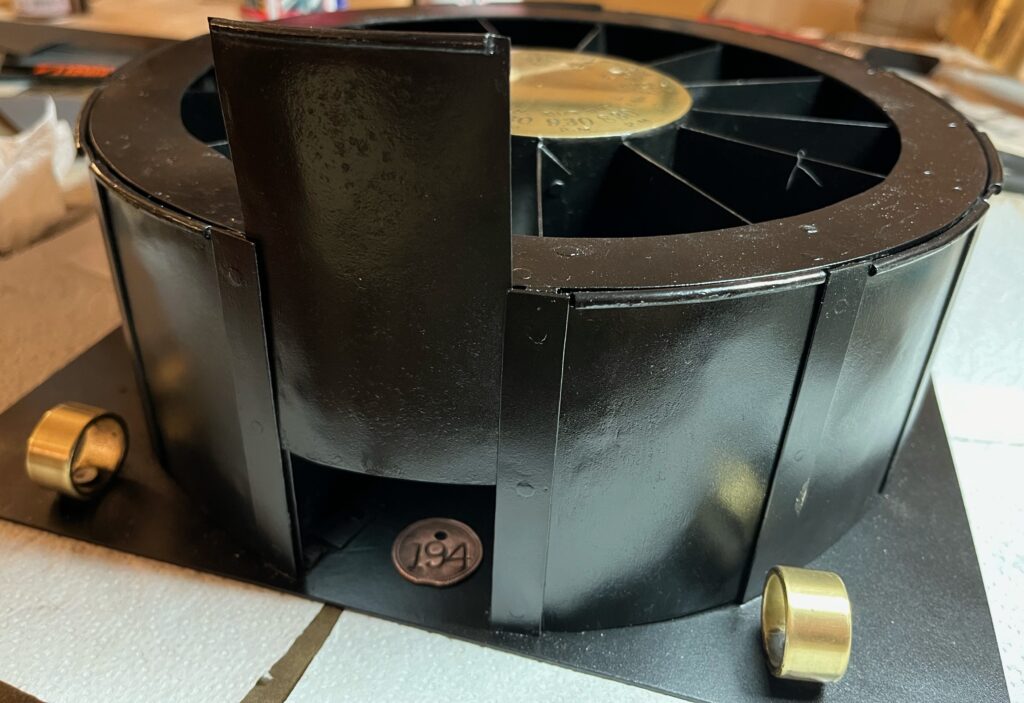
It took some time to understand the shaft drive mechanism, which is driven by its own heavy duty spring. It comprises of a 24-hour wheel geared to the clock, with pins set at the times that the shaft is to rotate, each shaft rotation being a thirteenth of 360 degrees. This enables the time check funnel to direct checks into the circular check container which is divided into 13 timed compartments. The shaft also rotates the brass drum with 13 corresponding engraved time periods displayed through the window.
360 divided by 13 (27.6923077 degrees each turn) makes it impressive (or just plain ridiculous) engineering!
With the front door dial glass sitting inside its brass bezel being the focal point of the machine, I couldn’t leave the original cracked glass in place.
Having failed dismally to hide the crack with various windscreen repair kits, I decided to bite the bullet and order a piece of custom made circular bevelled glass to fit. There was only a 1.5mm rim for the glass to sit on, and the bevel angle and depth was critical to replicate the original.
Drawings were made and sent to a restoration glass specialist (https://pearsonsglassprocessing.co.uk/) who made and delivered the perfect piece of replacement glass.
The lock on the check compartment access door was missing, but I managed to ebay source an old replacement lock which fitted near perfectly. I dismantled it, and by re-arranging and filing the levers I was able to replicate the door lock and make one key that fit both.
So with all the hard work done, everything was now ready to be assembled.
And finally, a very short video showing the machine in operation: